You can add or remove widgets on the administrator dashboard to streamline what information you see, and how it looks. Widgets are added and removed via the widget library.

Currently this information is saved in your browser, so if you use a different computer or browser the Lens dashboard may revert to the default widget layout. This will be addressed in a future Lens Portal update.
Adding widgets
-
Log into the Lens Portal
-
In the left sidebar, go to the
Overviewmenu and select theDashboarditem -
At the bottom of the left sidebar, go to the
Widgetsmenu and select theUnlock widgetsitem. Please note, this option is only available on the administrator dashboard page.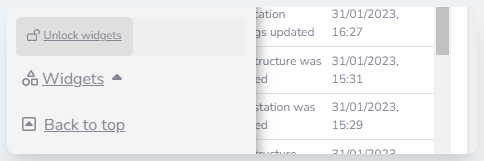
Bottom of the Lens Portal sidebar -
A new option
Add/Remove widgetsshould be visible in the menu, select this item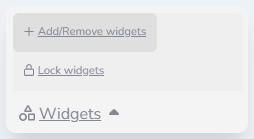
-
In the
Add widgetsmodal, click theAddbutton on all the widgets you would like to have on your dashboard.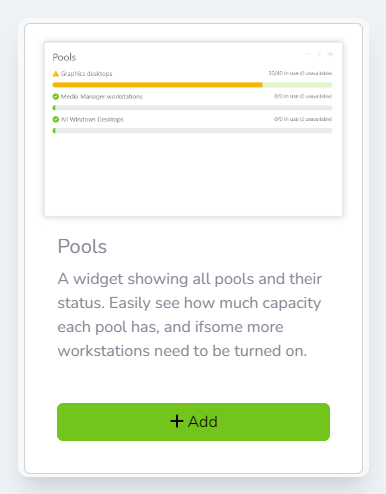
-
Once you have selected all the widgets you require, scroll to the bottom of the modal and click the
Donebutton -
When you are done, open the left sidebar. At the bottom of the left sidebar, go to the
Widgetsmenu and select theLock widgetsitem. This will prevent widgets accidentally being moved or resized.
Removing widgets
-
Log into the Lens Portal
-
In the left sidebar, go to the
Overviewmenu and select theDashboarditem -
At the bottom of the left sidebar, go to the
Widgetsmenu and select theUnlock widgetsitem. Please note, this option is only available on the administrator dashboard page.
Bottom of the Lens Portal sidebar -
A new option
Add/Remove widgetsshould be visible in the menu, select this item
-
In the
Add widgetsmodal, click theRemovebutton on all the widgets you would like to remove from your dashboard.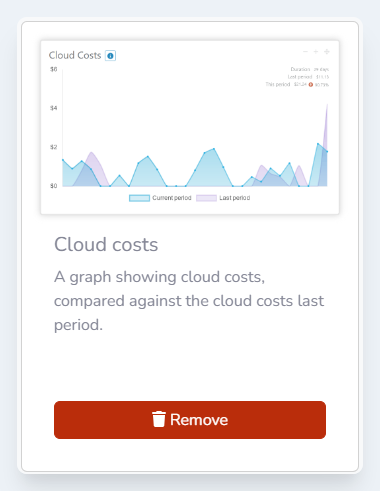
-
Once you are done, scroll to the bottom of the modal and click the
Donebutton -
When you are done, open the left sidebar. At the bottom of the left sidebar, go to the
Widgetsmenu and select theLock widgetsitem. This will prevent widgets accidentally being moved or resized.