In the 7FiveFive NAS system, a file share is a folder that is presented and shared to users via the SMB protocol. You can create as many different shares as you require, simply by using the Share configuration section in the Dashboard.
Creating a share
Only use alphanumeric characters, spaces, dashes and underscores in share names. Other characters are not permitted.
-
From the
Sharesmenu, selectConfiguration -
Click the
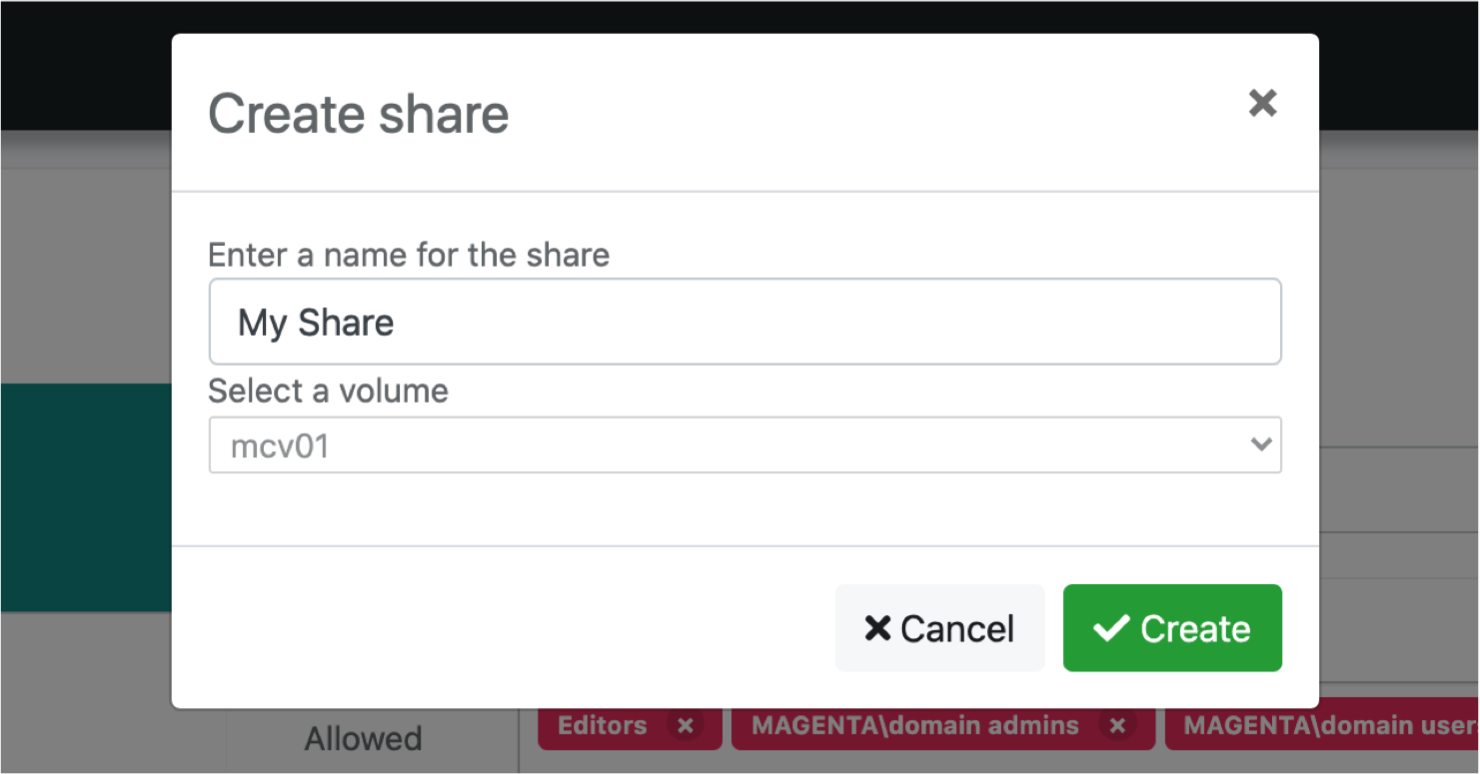
Create sharebutton -
Select the volume which you wish to create the share on
-
Enter a name for the share
-
Click the
Createbutton -
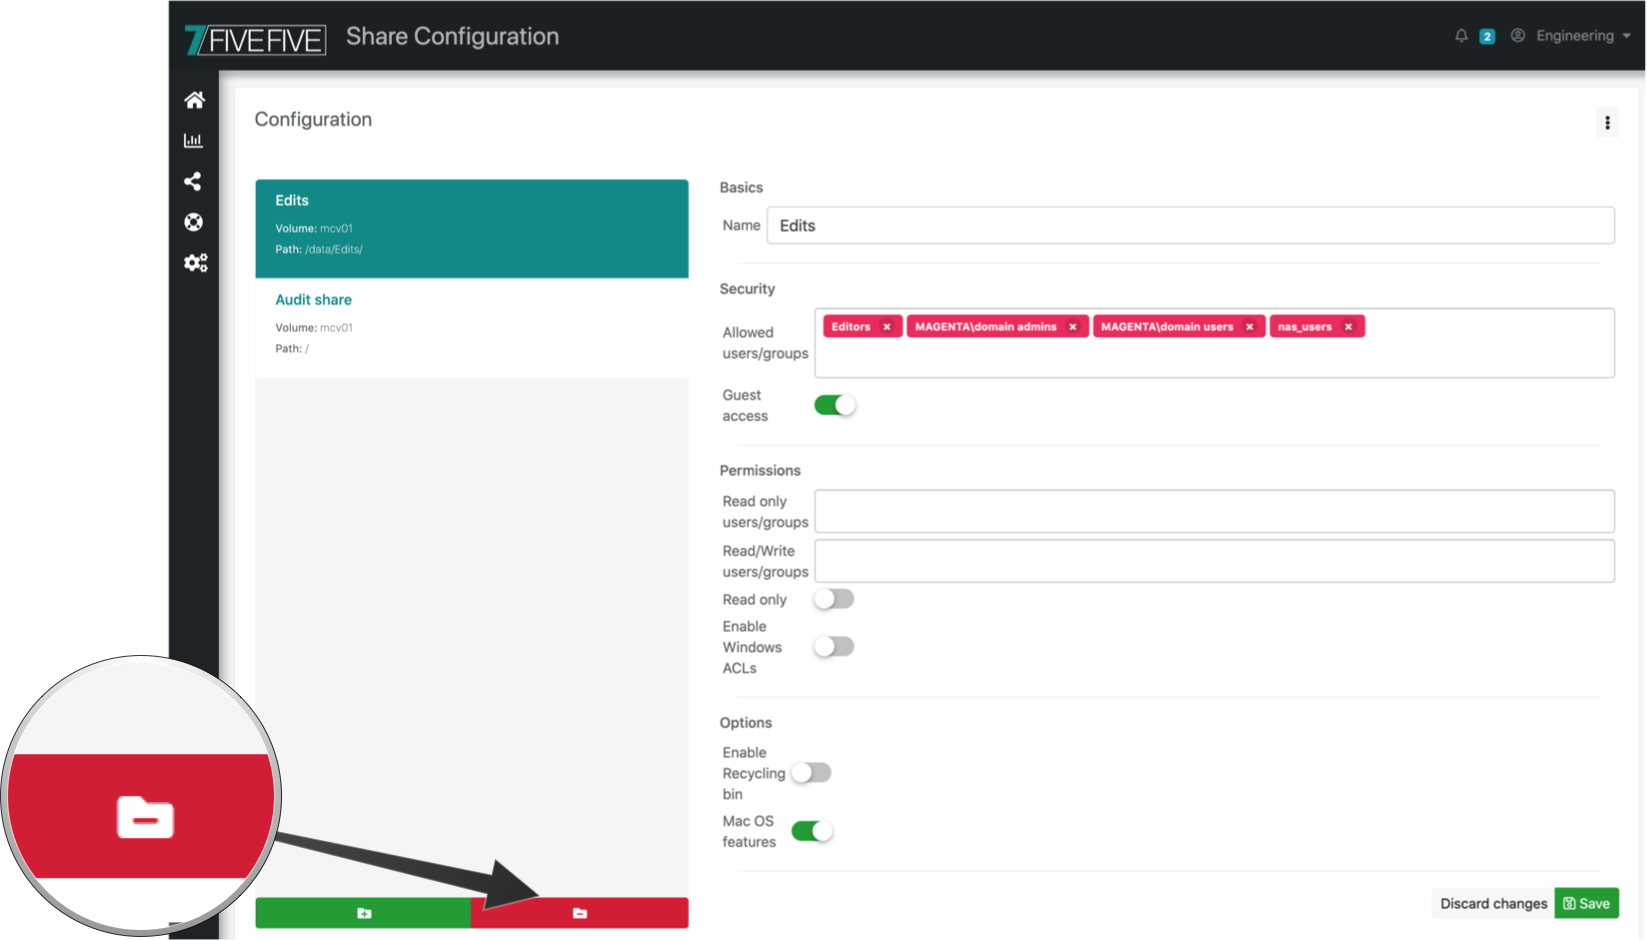
Once you have created the share, it will be selectable from the list. Make any changes you require in this section and then press the
Savebutton to commit the new share & changes to all the nodes in the cluster.
Removing a file share
Removing a share will not delete the data in the folder that has been shared, therefore you should remove all data from the share before deleting it. Please contact 7FiveFive Support for assistance.
-
From the
Sharesmenu, selectConfiguration -
Select the share you would like to remove from the list
-
Click the delete share button, and press confirm when the confirmation box appears.
Enabling/Disabling guest access
By default, the 7FiveFive NAS system will not enable guest access to file shares, as this allows users to connect without a username and password. However, if you would like this for a particular share, then follow the steps below:
-
From the
Sharesmenu, selectConfiguration -
Select the share you wish to change from the list.
-
Under the
Securitysection, set theGuest accessswitch to on/off -
Click the
Savebutton
Specifying allowed users
It is recommended that shares are locked down to specific users and/or groups. This is to prevent anyone with a valid user account from accessing the share, even if it is not what they need access to.
Ensure that either the AD/LDAP settings have been configured and/or the local users option is enabled on the configuration page. See here for more.
If the Allowed users/groups option is left blank, the system will allow any user with a valid login access to the share.
-
From the
Sharesmenu, selectConfiguration. -
Select the share you wish to change from the list.
-
Under the
Securitysection, click into theAllowed users/groupsfield -
Start by typing either the name of a group or user into the text box, a box of suggestions should appear. Select the user or group you require from the box. You can add as many users or groups as you like.
-
Click the
Savebutton
Other options
There are many different options that can be tweaked to change how a share works. Below is a list of the options currently available via the Dashboard.
|
Name |
Description |
Options |
|---|---|---|
|
Read only user/groups |
A list of users or groups which should only have read access to the share, not write access. If left empty, all users that have access to the share will be able to read/write from the share. |
Local or AD users & groups |
|
Read only |
Whether the share should be read only, or if write access should be allowed. |
On - Share is read only
|
|
Enable Windows ACLs |
Enables Windows ACLs on the share, which can be configured via the Windows Explorer. This option cannot be turned off via the dashboard once enabled. Contact 7FiveFive Support if you require this. |
On - ACLs enabled on share
|
|
Enable recycling bin |
When enabled, If a file/folder is deleted, it will be moved to a hidden folder in the share called ‘.recycle’ instead of being deleted. |
On - Recycling bin is enabled
|