Configuring a broker
Once you have configured a broker in Lens, this broker then needs to be associated with a site. This is because a single broker can be responsible for multiple sites. Or each site may need its own broker. It completely depends on the environment and the configuration of the Lens platform.
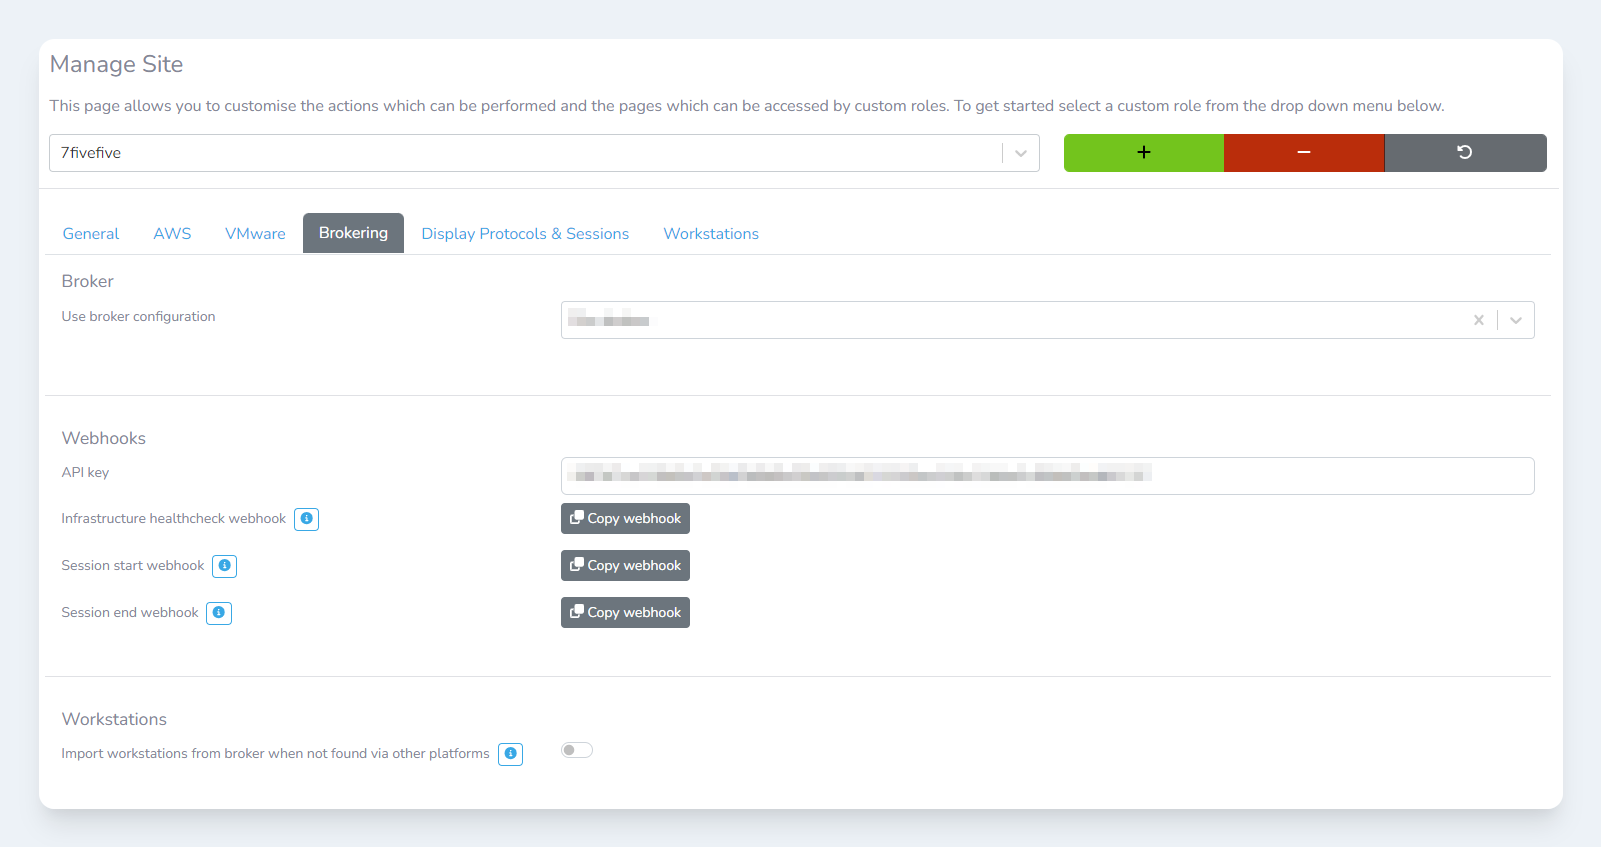
To set a broker for the site:
-
Login to the application
-
In the left sidebar, select
Configurationthen click theSettingsoption -
Select the
Manage siteitem from theSites and Collectorssection -
Select the site you would like to edit from the dropdown menu
-
Click the
Brokeringtab -
Scroll down to the
Brokersection -
In the
Use broker configurationfield, select the broker configuration you created previously. See this article for more. -
Scroll to the bottom of the page
-
Click the
Savebutton
Webhooks
Webhooks help make the Lens application smarter. As Lens is not a connection broker, we do not always know when certain events happen. If the broker supports it, then it’s highly recommended to configure webhooks.
Importing broker desktops
The Lens Portal supports importing desktops from some brokers. Currently, the supported brokers are:
-
Leostream Broker
This will show all desktops that are present in the supported broker.
To enable this feature:
-
Login to the application
-
In the left sidebar, select
Configurationthen click theSettingsoption -
Select the
Manage siteitem from theSites and Collectorssection -
Select the site you would like to edit from the dropdown menu
-
Click the
Brokeringtab -
Scroll down to the
Workstationssection -
Enable the
Import workstations from broker when not found via other platformstoggle -
Scroll to the bottom of the page
-
Click the
Savebutton