Configuring Duo MFA
Prerequisites
-
You will need administrator access to the 7fivefive Lens Portal
-
You will need administrator access to your Duo account
Creating the Duo application
Before configuring the Lens Portal, we need to create a Duo application. This will provide us with the API credentials we need to connect via the Lens Portal.
-
Log in to the Duo administrator dashboard
-
In the left-side menu select
Applications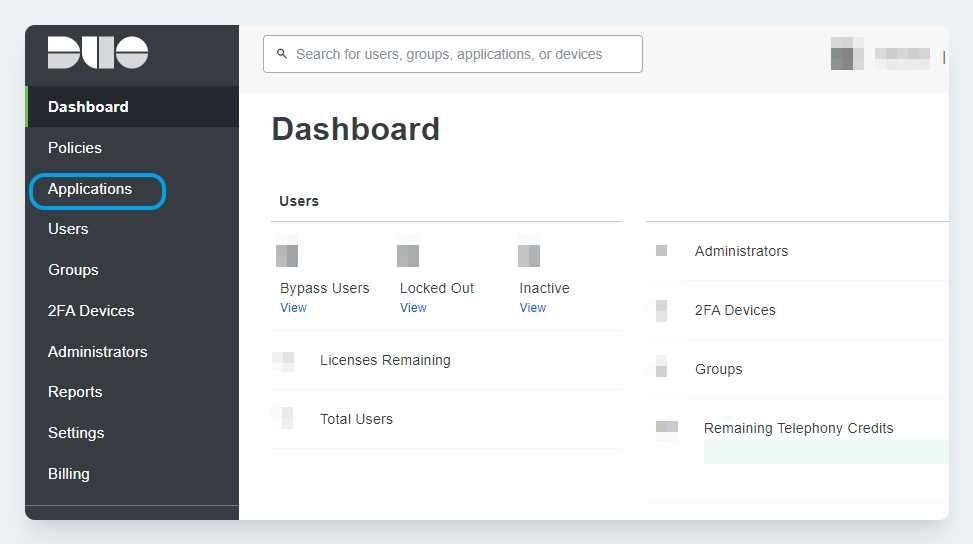
-
Click the
Protect an Applicationbutton -
In the search box, enter
Web SDK. On theWeb SDKitem, click theProtectbutton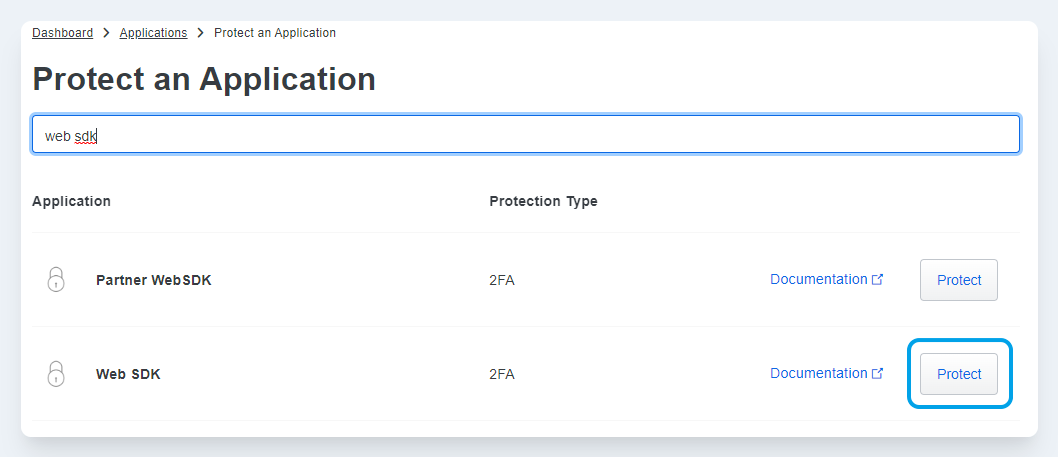
-
Make a note of the following details
-
Client ID -
Client secret -
API hostname
-
-
Scroll down to the
Settingssection. In theNamefield enter something likeLens Portal. This can be anything, however, it is recommended to have something that is descriptive so the application is not modified by accident in future. -
Depending on your authentication provider (AD, SAML etc) you may want to enable the
Simpleoption in theUsername normalizationfield. -

Click the
Savebutton
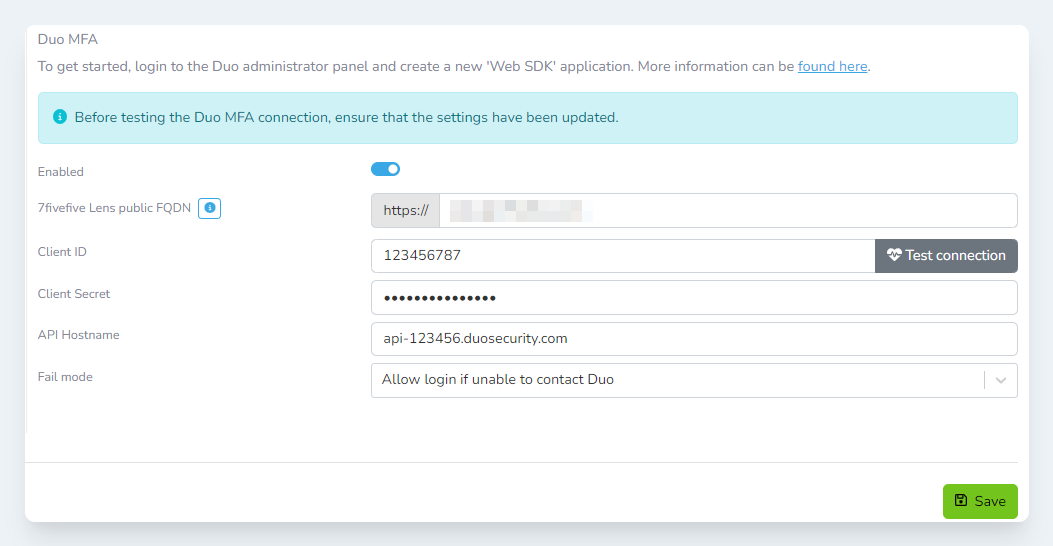
Configuring the Lens Portal
-
Login to the Lens Portal. The user must have the 'Access to Settings' permission for the location where the scheduler will be enabled.
-
In the left sidebar, open the
Configurationmenu, then select theSettingsoption -
Under the
Generalgroup, select theAuthenticationoption -
Click the
Multi-Factor Authenticationtab -
Check the
Enabledtoggle -
Ensure that the Lens Portal FQDN is correct in the
7fivefive Lens public FQDNfield -
In the
Client IDfield, enter the client ID saved from the previous section -
In the
Client Secretfield, enter the client secret saved from the previous section -
In the
API Hostnamefield, enter the API hostname saved from the previous section -
In the
Fail modeselection box, choose how you want the portal to behave if it is unable to contact Duo. -
Click the
Savebutton -
Confirm the connection by scrolling to the Client ID field and clicking the
Test connectionbutton.