.png)
Monitoring storage
The Lens Portal makes checking the health and status of your storage easy. In one interface, you can get an overview of multiple storage devices or services. Keeping storage systems healthy is a critical part of maintaining the Lens platform and for ensuring users have a smooth, error-free experience.
Monitoring and managing volumes
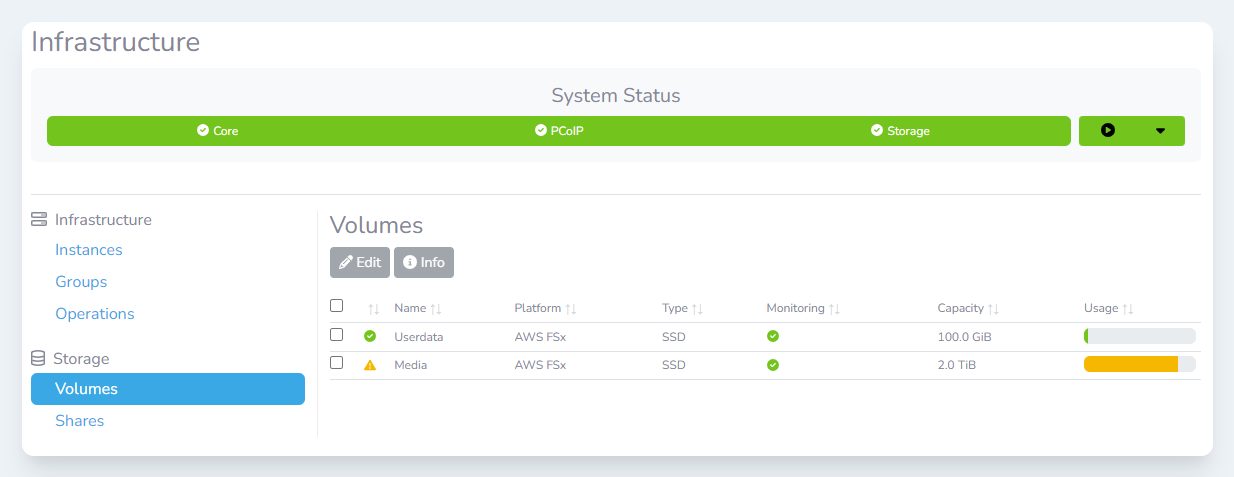
Storage volumes are the top-level item that we monitor. A volume may be a storage cluster or a cloud storage service. For example, a single AWS FSx volume is a volume in Lens. A single volume can often have multiple file shares configured, allowing a volume to be used for many different workflows.
Viewing the health of a volume
Volumes will automatically be detected in the Lens platform and will be displayed without users needing to do anything.
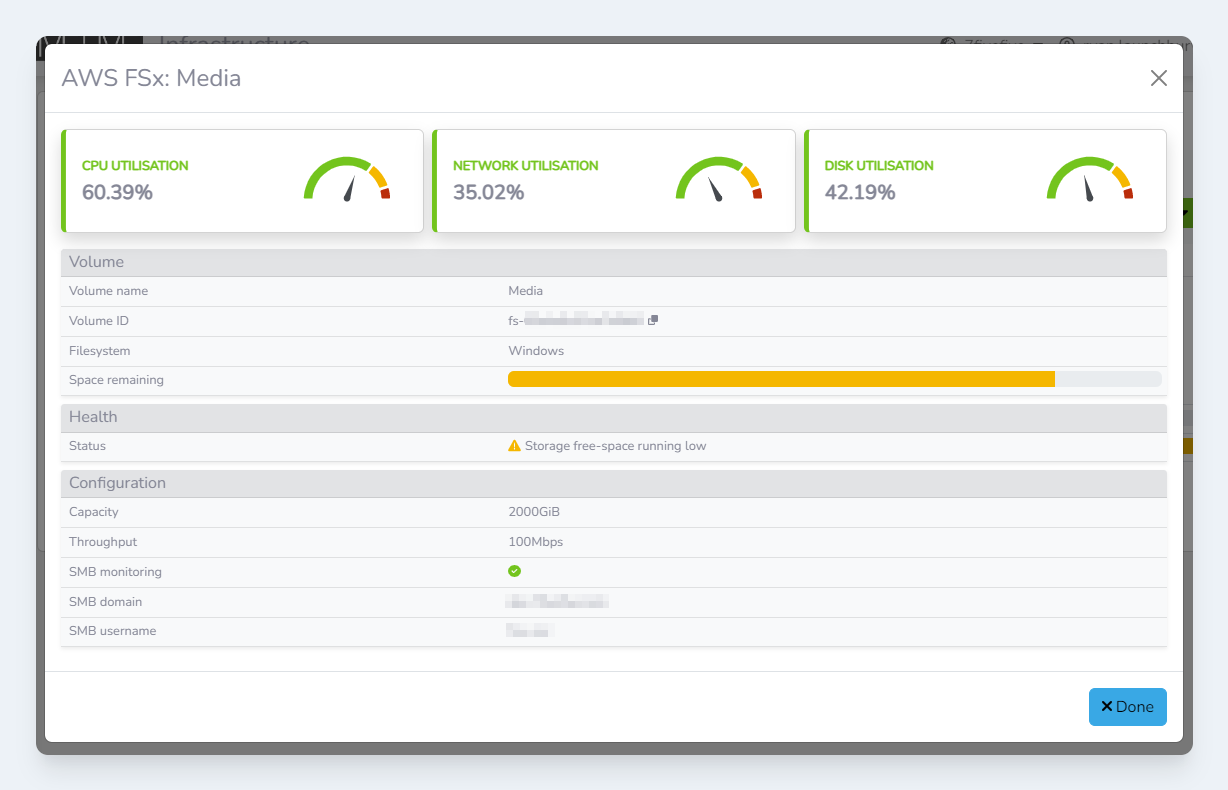
The Volume info modal
To see the status of a volume:
Login to the Lens Portal
In the left sidebar, expand the
Overviewmenu, and then select theInfrastructureitemIn the
Storagesection, select theVolumesoptionCheck the checkbox next to the volume you would like to monitor
Click the
InfobuttonThe volume information modal will open
Once you are finished click the
Donebutton
Configuring a volume for share monitoring
The Lens Portal can query the storage system and get a list of shares, along with useful information for the top-level directories. This can be very useful for monitoring user data volumes, to know which user is consuming most of the available space. Currently, only SMB file shares are supported.
If your storage system requires credentials to be accessed, then it is highly recommended that you create a service account or user that has minimal rights that only the Lens Portal will use. This user requires the following permissions:
List SMB shares
Read access to any share that has monitoring enabled (To allow Lens to collect directory usage data)
To allow Lens to query the storage system:
Login to the Lens Portal
In the left sidebar, expand the
Overviewmenu, and then select theInfrastructureitemIn the
Storagesection, select theVolumesoptionCheck the checkbox next to the volume you would like to configure
Click the
Editbutton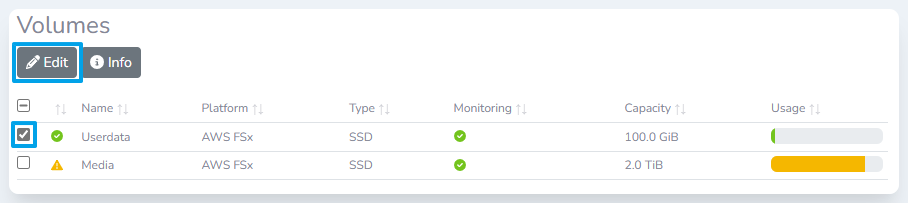
The
Edit volumemodal will appear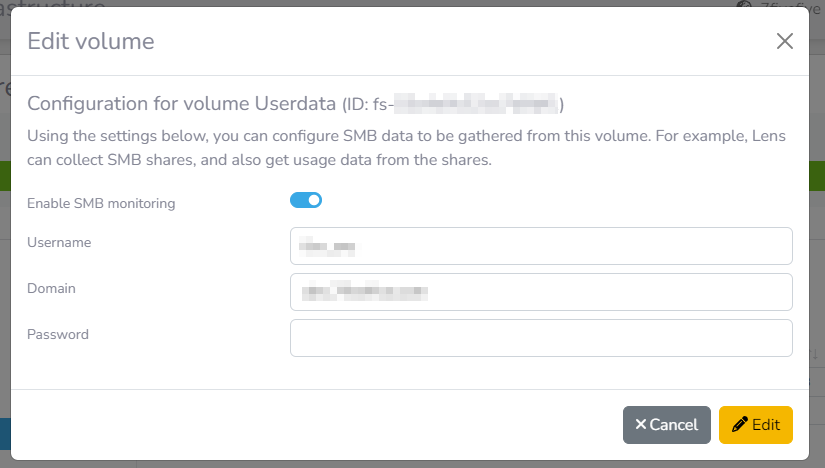
Enable the
Enable SMB monitoringtoggleIf credentials are not required, skip this step:
Enter the username for the share
Enter the domain name for the user (if required). This option is usually only required for systems that are bound to an Active Directory system
Enter the password for the user
Click the
Editbutton
Monitoring shares
Monitoring share usage can be very helpful when diagnosing issues and offboarding users. It is possible to monitor some shares whilst not monitoring other shares.
When a share is monitored, the Lens Portal will request disk usage data from each directory at the top level of the share every 30 minutes. Depending on the storage provider, this can be an intensive process so it is recommended to not use this on shares with very high numbers of files.
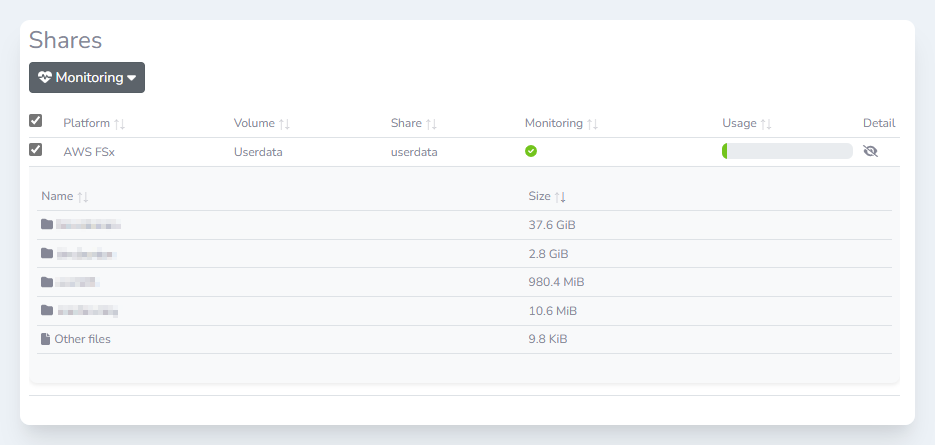
A monitored share showing directory utilisation
Enabling share monitoring
Login to the Lens Portal
In the left sidebar, expand the
Overviewmenu, and then select theInfrastructureitemIn the
Storagesection, select theSharesoptionCheck the checkbox next to the shares you would like to monitor
Click the
Monitoringdropdown button, then select theEnable monitoringitemIn the modal, ensure the correct shares are selected then select the
Enablebutton
Disabling share monitoring
Login to the Lens Portal
In the left sidebar, expand the
Overviewmenu, and then select theInfrastructureitemIn the
Storagesection, select theSharesoptionCheck the checkbox next to the shares you would like to modify
Click the
Monitoringdropdown button, then select theDisable monitoringitemIn the modal, ensure the correct shares are selected then select the
Disablebutton