.png)
Adding & removing a bookmark
Adding a bookmark
Login to the 7fivefive Lens application with a user that has the
Administratorrole or has theAccess to Settingsoption enabled on their role.In the sidebar or navigation bar go to the
Configurationoption, then select theSettingsitem from the menuUnder the
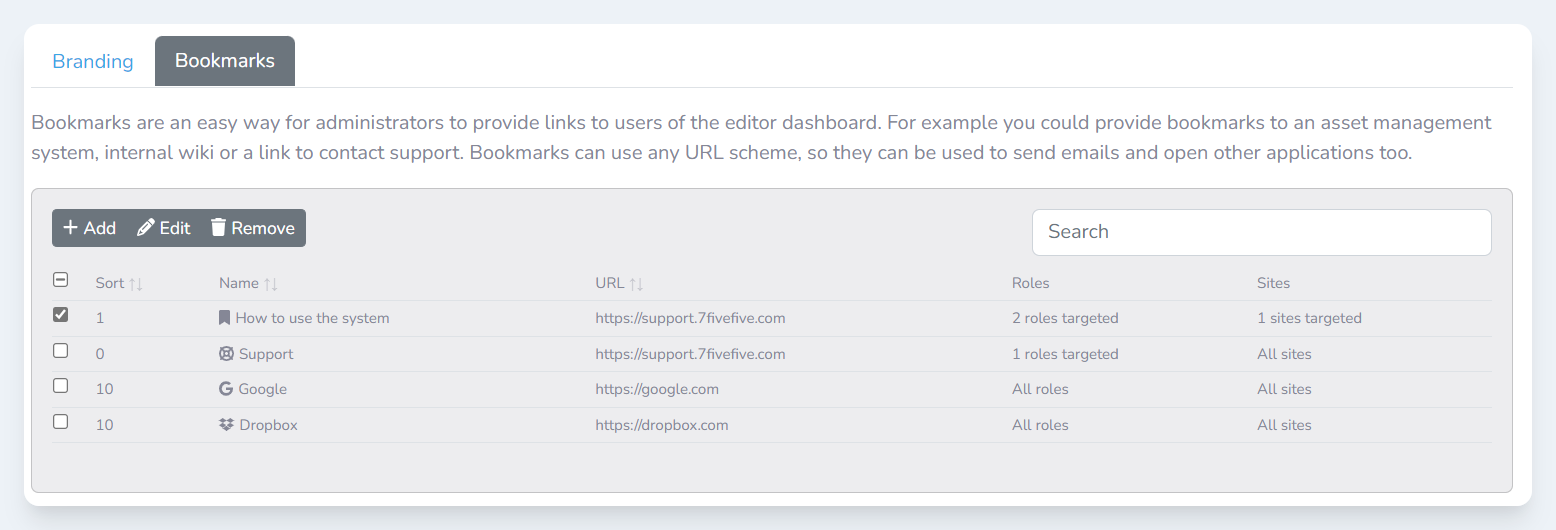
Generalsection, select theCustomisationoptionClick the
BookmarkstabClick the
Addbutton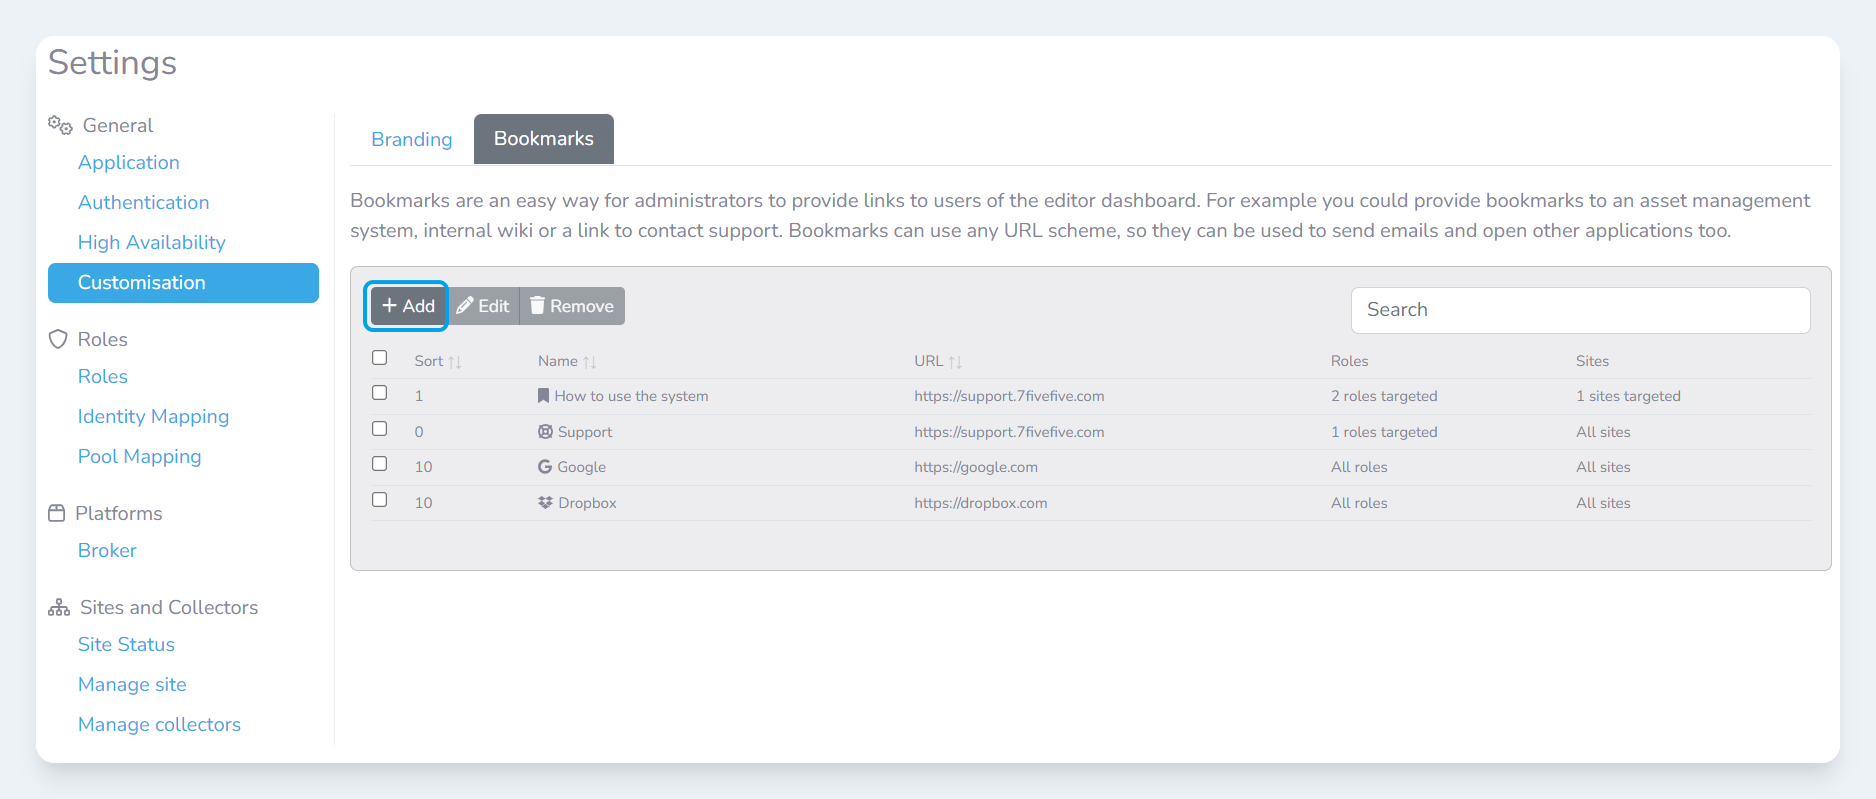
The
Add bookmarkmodal will appear. In theNamefield, enter the name for the bookmark. This is what will be displayed on the Editor Centre page.(Optional) Enter a description for the bookmark. This will be shown underneath the bookmark name on the Editor Centre page.
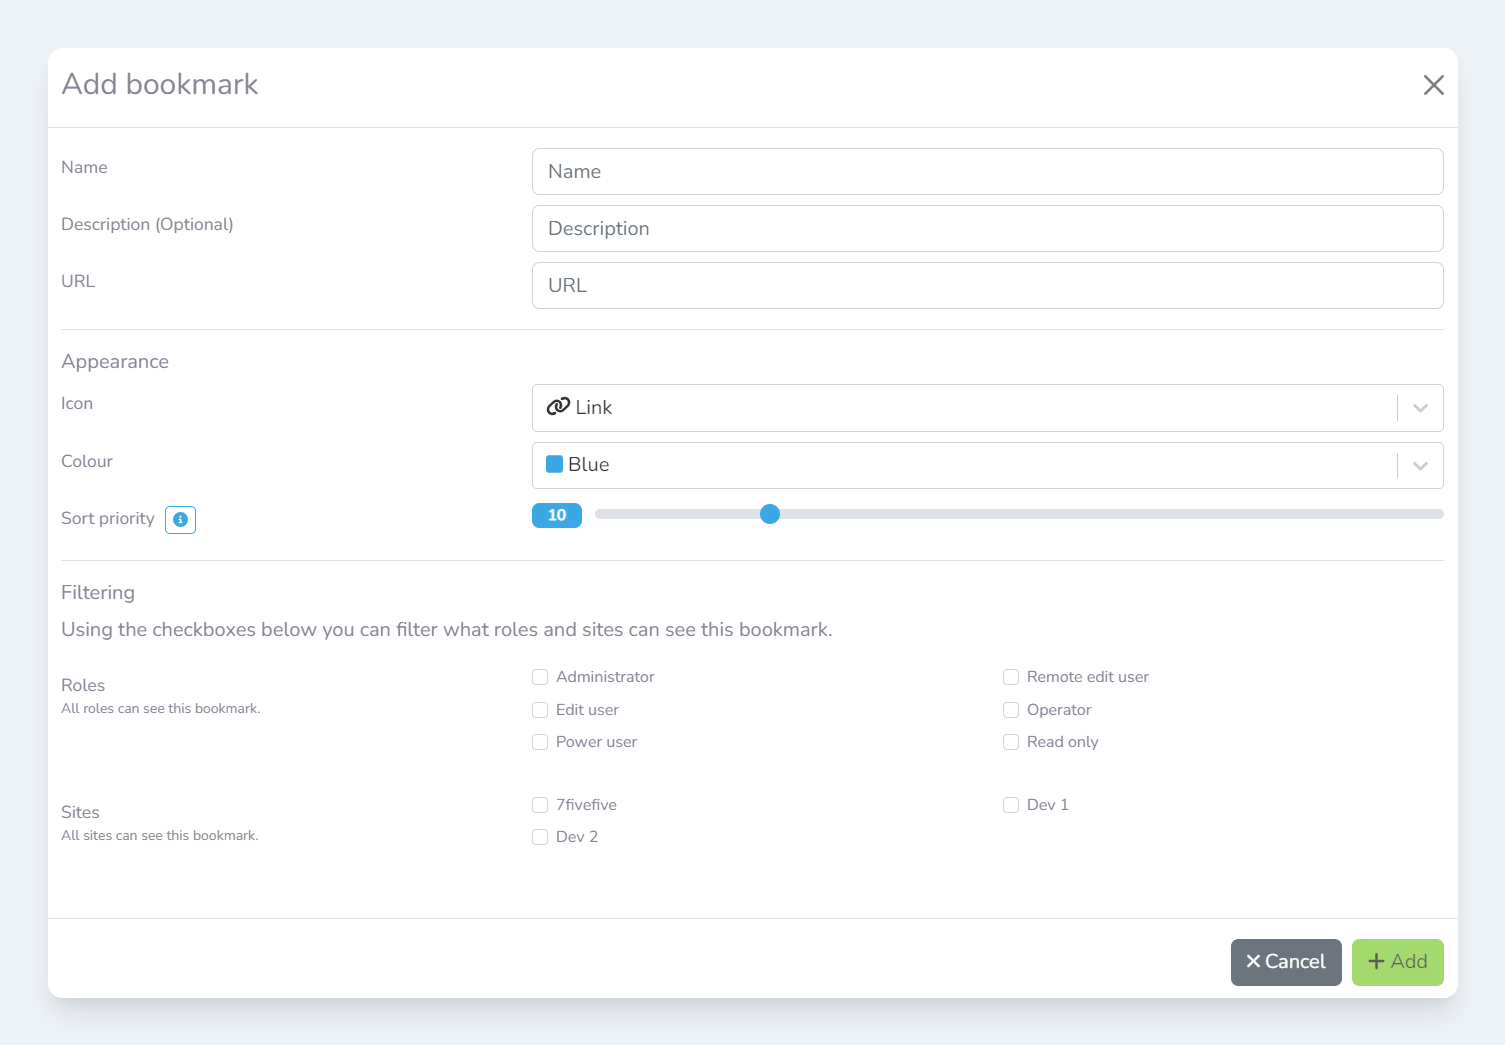
In the
URLfield, enter the URL that users will be taken to when the bookmark is clicked(Optional) Select an icon for the bookmark
(Optional) Select a colour for the bookmark
(Optional) Set the sort priority number for the bookmark. A value of
0will mean the bookmark is at the top of the list.(Optional) Specify which roles can see the bookmark
(Optional) Specify which sites can see the bookmark
Click the
Addbutton
Removing a bookmark
Login to the 7fivefive Lens application with a user that has the
Administratorrole or has theAccess to Settingsoption enabled on their role.In the sidebar or navigation bar go to the
Configurationoption, then select theSettingsitem from the menuUnder the
Generalsection, select theCustomisationoptionClick the
BookmarkstabCheck the checkbox next to each bookmark you would like to remove
Click the
Removebutton