One of the core elements of the Remote Edit Dashboard is the ability to schedule infrastructure to startup and shutdown automatically. This provides vast cost savings when using platforms such as AWS which charge for the amount of time an instance is running for. The Remote Edit Dashboard can be configured to suit different requirements and environments. When the infrastructure scheduler shut down the system, it will turn off all workstations first without any warning to users. To access the scheduler settings, go to:
-
In the sidebar or navigation bar open the
Schedulingdrop-down -
Select the
Infrastructureoption
Customising the scheduler
Before turning on the scheduler we recommend that administrators customise it to ensure that it has the desired effect when enabled. See the section below for information about each configuration option.
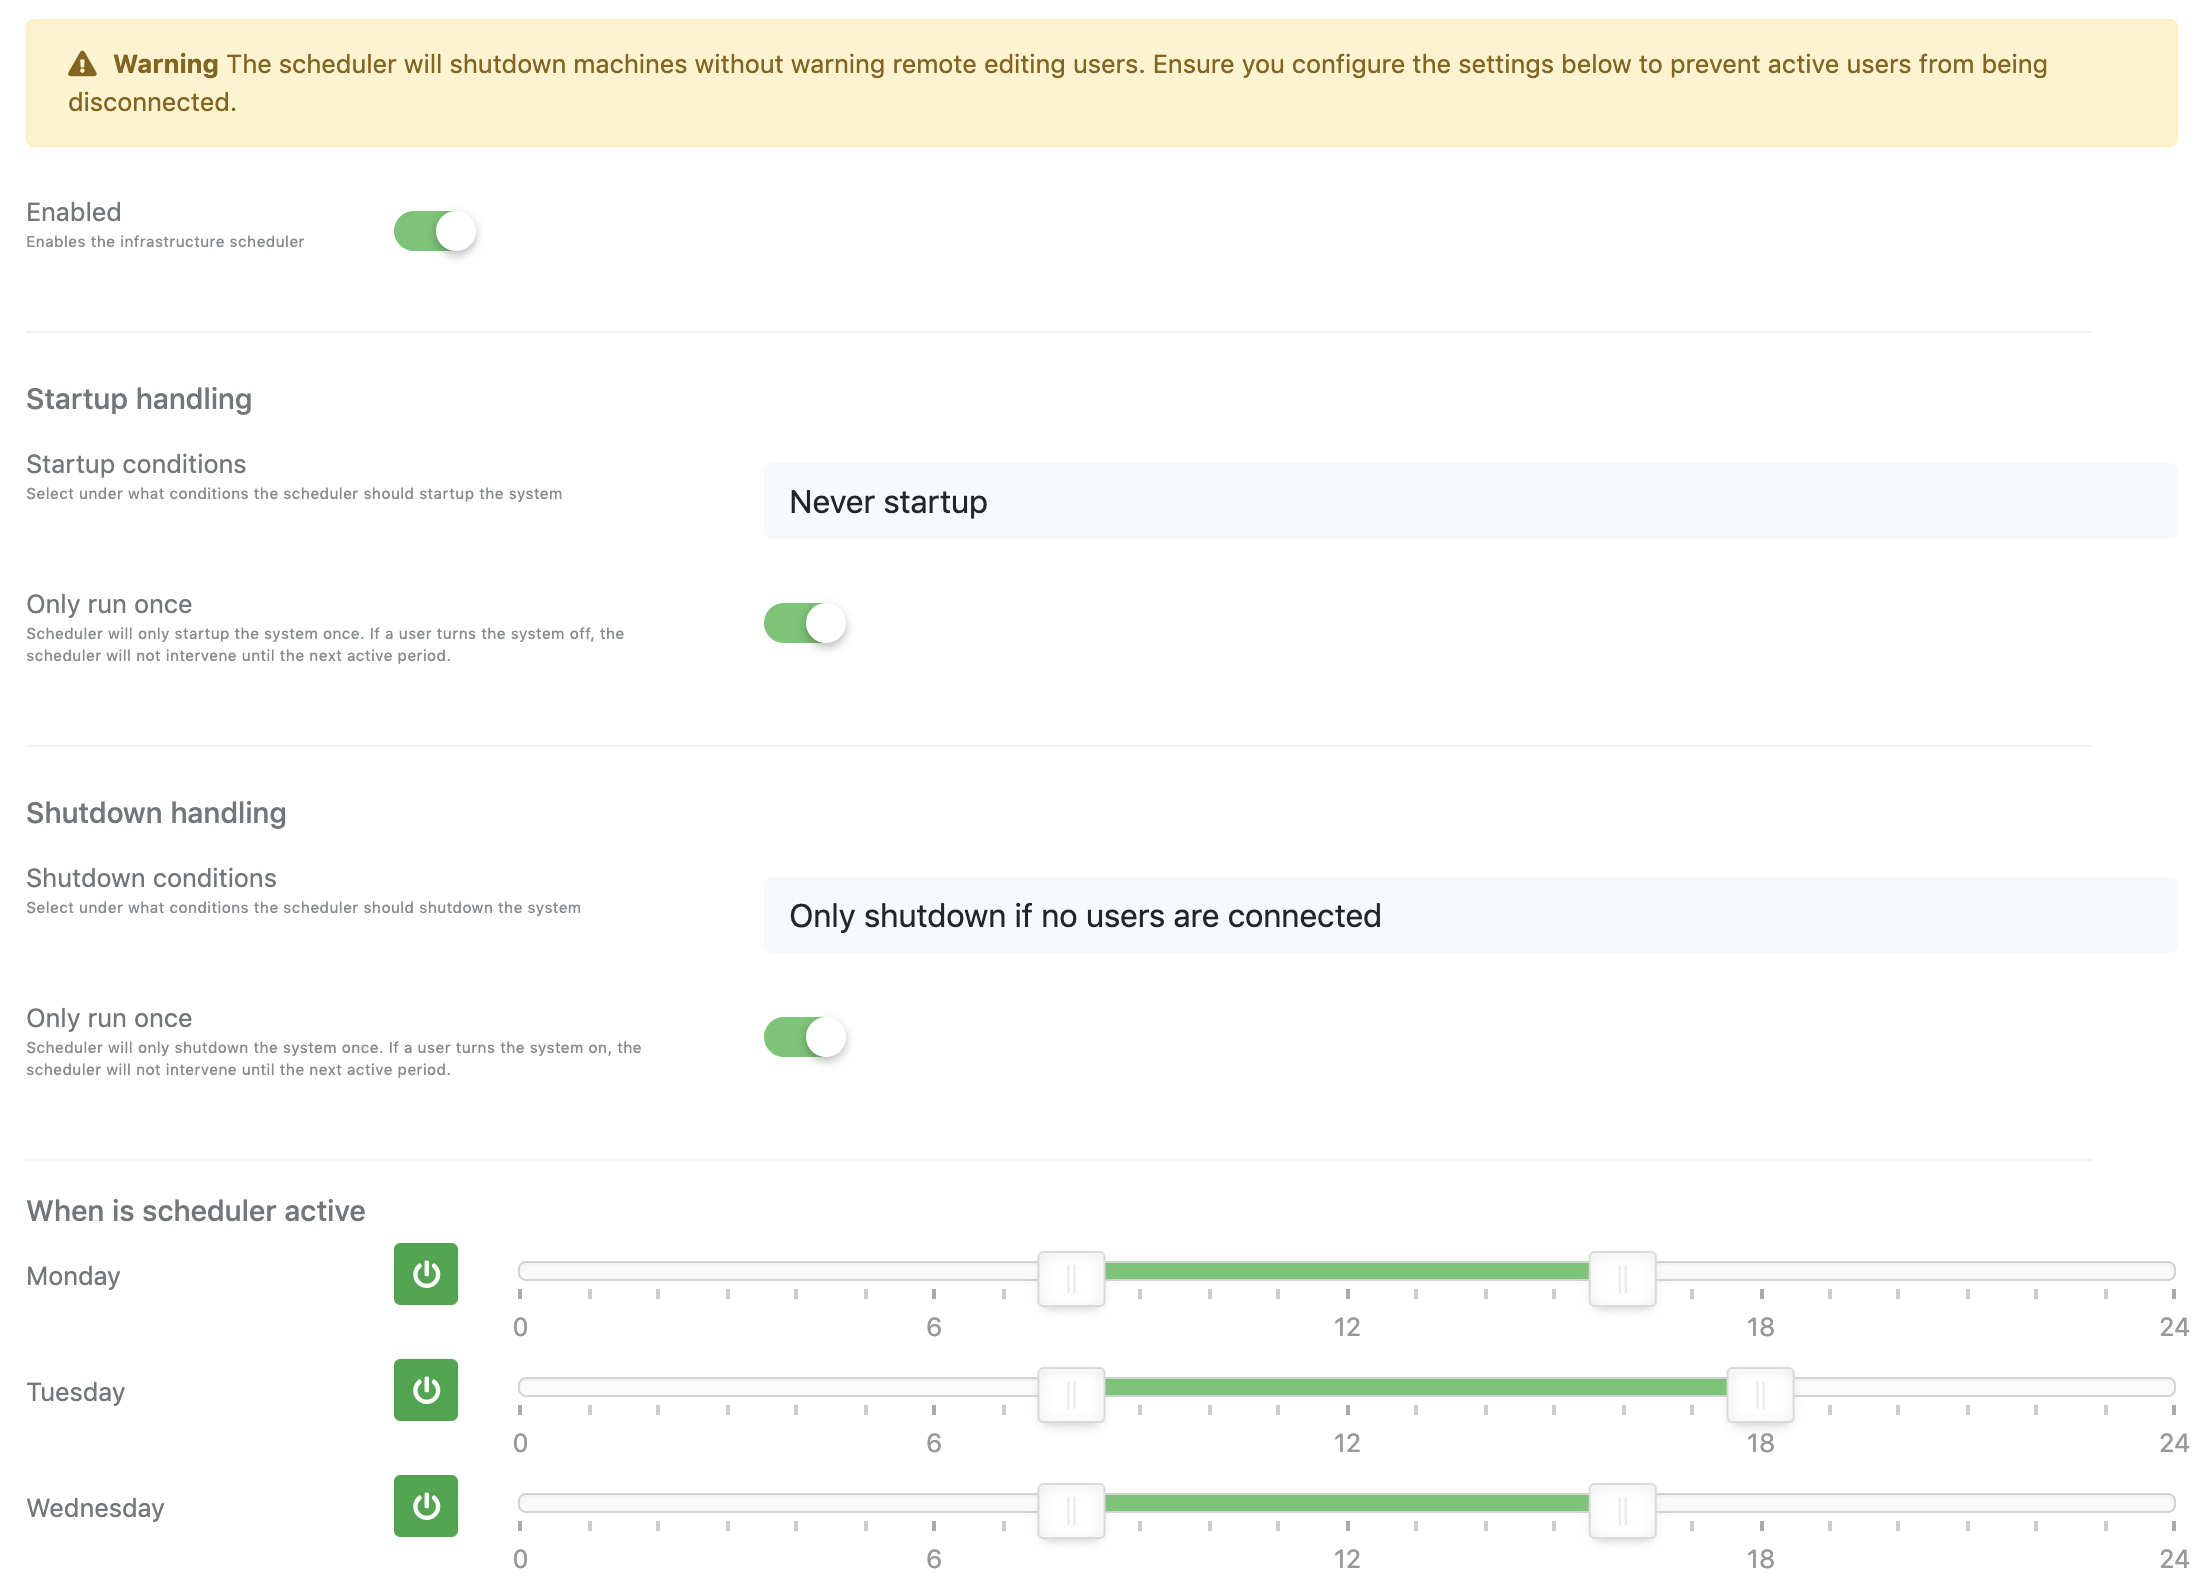
Enabled
If checked the infrastructure scheduler is enabled and is allowed to run. This does not indicate if the scheduler is active. The difference between these two terms is as follows:
-
Enabled - Scheduler is enabled
-
Active - Scheduler is enabled and is within its operating hours for a particular day
Startup handling
Startup conditions
This option controls whether the scheduler will start up the system or not. In some environments, the scheduler is used as a tool to ensure all instances are turned off at the end of the day. In this example, setting the Startup conditions to Never startup would achieve that result.
Only run once
By default, the scheduler will start the system repeatedly within its operating hours. If a user shuts down the system, the scheduler will turn it back on again. This can lead to users fighting against the scheduler. To prevent this, enable the Only run once option. This will start the system only once per day, and will not take any further action after this.
Shutdown handling
Shutdown conditions
The scheduler currently only monitors PCoIP user connections before deciding if the system should be shut down.
This option controls how the system should operate when the scheduler is active, and it’s out of operating hours.
-
Never shutdown- The scheduler will never turn off the system -
Always shutdown- The scheduler will shut down the system regardless of active users -
Only shutdown if no users are connected- The scheduler will wait until the last user has disconnected before turning off the system
Only run once
By default, the scheduler will shut down the system repeatedly if it detects that it’s turned on outside of operating hours. If a user manually starts up the system, the scheduler will turn it back off again. This can lead to users fighting against the scheduler. To prevent this, enable the Only run once option. This will stop the system once a day, and will not take any further action after this.
Configuring the schedule
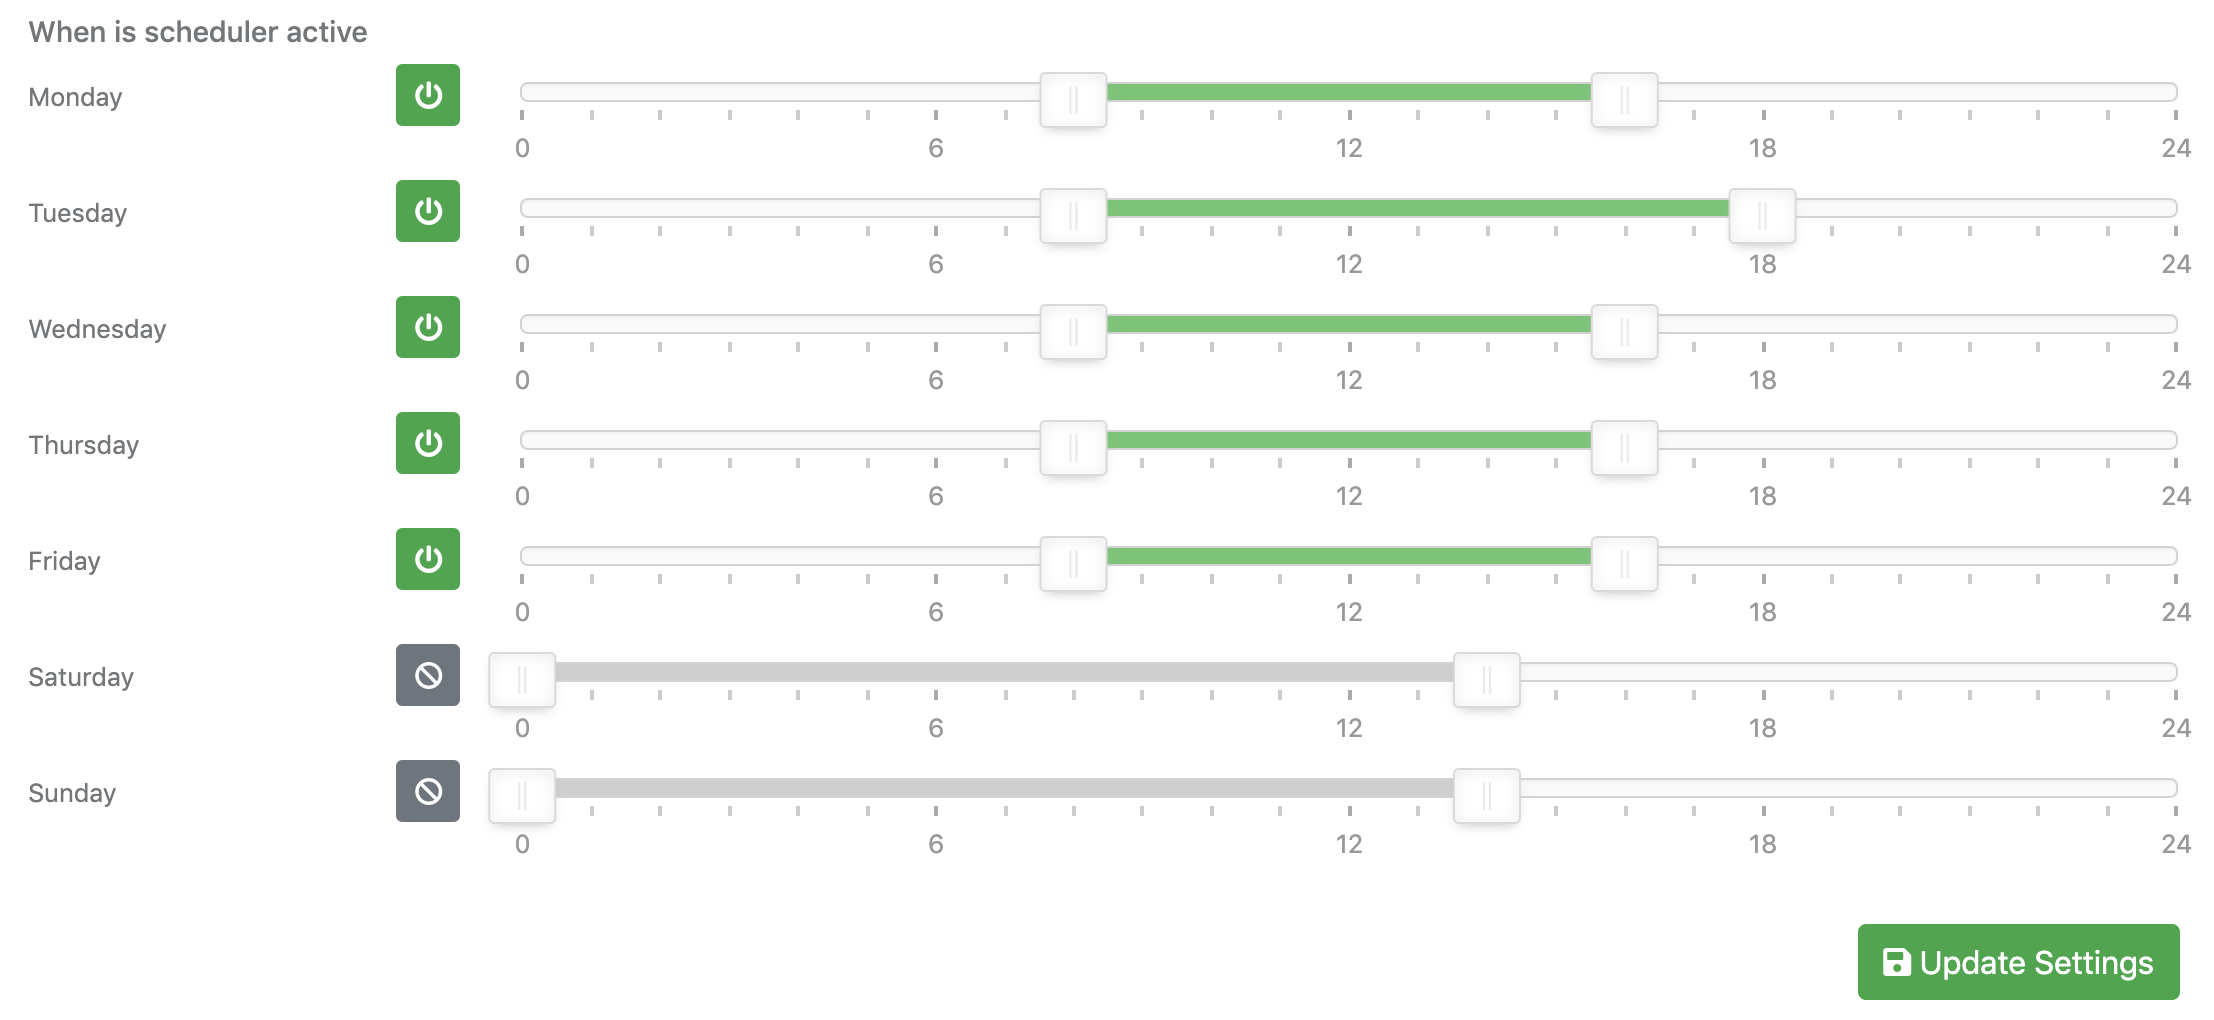
The scheduler can be configured independently for each day of the week. Days can also be marked as disabled to prevent the scheduler from taking any action. The green bars in the image above indicate the systems operating hours (where the scheduler will turn on the system), and outside operating hours (where the scheduler will turn off the system). Greyed out bars indicate that the scheduler is disabled for that particular day. The numbers on the sliders indicate hours in 24-hour format.
To modify start/stop times, drag the relevant slider to the desired hour. To disable/enable a particular day, click the corresponding button next to that day’s slider.
Saving changes
Once you have made the required changes to the scheduler, scroll to the bottom of the page and click the Update settings button.
Starting workstations on system startup
Once the scheduler has powered on the system and ensured that all services are ready, it can turn on any number of remote edit workstations. Administrators can easily customise which machines are turned on by doing the following:
-
Navigate to the
Dashboardpage (found in theSystemmenu) -
Scroll down to the
Desktop statussection -
Select the desktop that should be turned on with the system
-
Select the
Get infooption. See the Workstation controls page for more. -
Scroll down to the
Workstation settingssection -
Under the
Schedulingsection, enable theTurn on workstation with infrastructureoption
To prevent a workstation from powering on with the system, disable this option.