Deployment templates are a way of creating new workstations in a particular way by passing different commands and settings to the platform on which they will be deployed on. This allows for a large amount of customisation for new workstations. Users can create as many templates as they require across multiple platforms and instance types. Currently, the Remote Edit Dashboard supports the following platforms for deployment:
-
Amazon Web Services EC2 (AWS)
-
VMware vCenter (VMware)
Creating a new template
There are two ways to create a template: creating a new template from scratch or cloning an existing one. This section will cover creating one from scratch.
The template cannot be renamed once it has been created. Use the Clone button to achieve this.
-
Navigate to the
Deployment Templatespage (found in theSystemmenu) -
Click the
Createbutton -
In the dialog box, enter a name for the template
-
Select the platform this template will be used for
-
Click the
Createbutton -
Select the new template from the list
-
Make any required changes to the template
-
Press
Save
Editing a template will not affect workstations that were deployed before the changes were made.
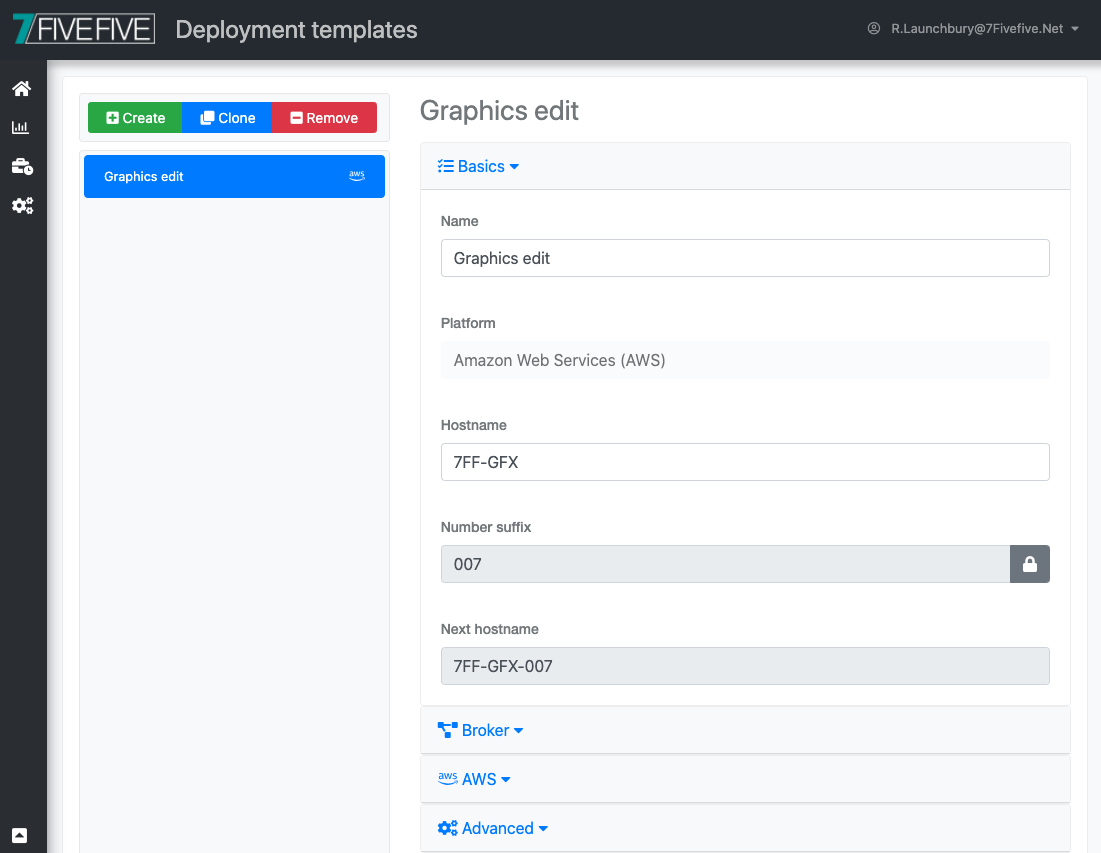
Template options
The list below shows the available fields and what they do. Some of the options may not be shown or may be disabled, depending on what platform the template is being deployed on:
-
Basics
-
Name - The name of the template
-
Platform - The platform which the template is for (cannot be changed)
-
Hostname - The base of the hostname for the deployed system
-
Number suffix - Appended to the end of the hostname (see more below)
-
Next hostname - Displays what the hostname of the next workstation will be
-
-
Broker
-
Pool - The broker pool which this workstation will be put into (see more below) (optional)
-
-
AWS
-
AMI/Template ID - A valid AWS AMI ID or OS from the drop-down
-
Instance type - The AWS EC2 instance type to deploy on
-
AWS security group ID - One or more AWS security groups to attach to the instance
-
AWS Role - An AWS EC2 Instance Role to attach to the instance (optional)
-
Subnet - An AWS VPC subnet which the instance will be deployed into
-
AWS key pair - An AWS key pair to deploy the instance with (see more below)
-
-
VMware
-
Datacenter - The VMware datacenter to deploy to
-
Datastore - The VMware datastore to deploy the VM
-
Resource pool - The resource pool to deploy the VM
-
VM folder - The folder the VM will be placed
-
Template - The template used to create the VM
-
Customisation specification - The customisation specification to use when deploying (optional)
-
-
Advanced
-
User data - Enter a script to be provided to AWS as user data (see more below) (optional)
-
‘Number suffix’ option
The Number suffix is a three-digit number that is appended to the end of the Hostname field. When an instance is deployed this number is incremented by one. Administrators can unlock this field and edit the next number if required. When using a number that has already been used, ensure that the remote edit system and its associated infrastructure has been cleaned up to ensure that the next deployment works as expected. Due to the complexity of cleaning up traces of old systems in some environments, it’s recommended to leave this field so as not to re-use hostnames.
‘Pool’ option
The Pool field allows users to select a broker pool to deploy the workstation. This is usually achieved by placing a three-digit code at the start of the hostname. To find out more about how to configure broker pools in the Remote Edit Dashboard see this page.
‘AWS key pair’ option
An AWS key pair is required for deploying new AWS EC2 instances. This key pair needs to be created separately via the AWS console. For more information see https://docs.aws.amazon.com/AWSEC2/latest/UserGuide/ec2-key-pairs.html.
‘User data’ option
The User data field allows users to define an AWS user-data script to run on the EC2 instance, which is often used to bootstrap the instance and prepare it for service. For more information see https://docs.aws.amazon.com/AWSEC2/latest/WindowsGuide/ec2-windows-user-data.html.
Cloning an existing template
If you need to make a few different templates that are slightly different from each other, cloning will allow you to do this much quicker than manually entering all the details again. Once a template has been cloned, it is a separate template from the template it was cloned from. Any changes to the original template will not affect templates that have been cloned from it.
-
Navigate to the
Deployment Templatespage (found in theSystemmenu) -
Select a template you want to clone from the list
-
Click the
Clonebutton -
In the dialog box, enter a name for the template
-
Click the
Clonebutton -
Select the new template from the list
-
Make any required changes
-
Press the
Savebutton
Removing a template
When a template is no longer required, it’s a good idea to remove it from the system to prevent users from accidentally deploying an incorrect template. Once a template has been removed, it is not possible to recover it.
-
Navigate the
Deployment Templatespage -
Select a template you want to delete from the list
-
Click the
Removebutton -
In the confirmation dialog, click the
Removebutton